
Removing a bathroom light fixture without screws might seem daunting, but with the right knowledge and tools, it’s a task you can easily tackle. In this article, we’ll provide you with a step-by-step guide about how to remove bathroom light fixture without screws to ensure you can complete this project safely and efficiently. Say goodbye to those stubborn fixtures and hello to a beautifully lit bathroom.
The Importance of Proper Lighting
Lighting plays a crucial role in creating the right ambiance in your bathroom. Before we dive into the removal process, let’s briefly discuss why it’s essential to have the right lighting in your bathroom.
Proper lighting can:
Enhance Your Bathroom’s Aesthetics: Well-placed lighting fixtures can highlight the design elements in your bathroom, making it more visually appealing.
Improve Functionality: Adequate lighting is essential for tasks like shaving, applying makeup, or reading in the bathroom.
Boost Safety: Good lighting reduces the risk of accidents and ensures you can navigate your bathroom safely, even at night.
Preparing for the Fixture Removal
Before you begin removing the fixture, it’s crucial to gather the necessary tools and take some precautions.
Tools and Materials Needed
Before you dive into the process of removing your bathroom light fixture without screws, it’s crucial to gather the necessary tools and materials. Having the right equipment on hand will not only make the job more efficient but also ensure your safety. Here’s a comprehensive list:
- Voltage Detector: This tool will help you confirm that the power supply to the fixture is indeed turned off, ensuring you work safely.
- Stepladder: Depending on the fixture’s height, a sturdy stepladder will provide you with the necessary elevation to reach and work comfortably.
- Screwdriver Set: While we’re going screwless, having a screwdriver set with various tips can be handy for other parts of the fixture or reinstallation.
- Adjustable Pliers: Useful for gripping and turning parts that may need to be detached or loosened.
- Wire Strippers: In case you need to cut and re-strip wires during the process.
- Electrical Tape: Electrical tape to secure and insulate wires as needed.
- Safety Glasses: Protect your eyes from debris and any potential hazards.
- Work Gloves: Keep your hands safe and provide a better grip on fixtures and components.
- Masking Tape: For labeling wires to ensure correct reconnection later.
- Plastic Bags or Containers: Use these to store screws, wires, and small components you remove so you don’t lose them.
- Drop Cloth or Plastic Sheet: To protect your bathroom surfaces from dust and debris.
- Replacement Fixture: If you plan to install a new light fixture, have it ready for installation after removal.
- Assistant (Optional): Having a friend or family member assist with holding the fixture during removal can be helpful for larger fixtures.
Importance of Having the Right Equipment
Having the correct tools and materials is vital for several reasons:
- Safety: Using the right tools minimizes the risk of accidents or injury during the removal process.
- Efficiency: The task becomes more manageable and less time-consuming when you have the appropriate equipment at your disposal.
- Preventing Damage: Using improper tools can lead to damage to the fixture or surrounding surfaces.
- Accuracy: The right tools ensure that you can complete each step correctly and with precision, especially when handling electrical components.
By ensuring you have all the necessary tools and materials ready, you’ll be well-prepared to remove your bathroom light fixture without the hassle of screws, making the process smoother and safer.
How to Remove Bathroom Light Fixture Without Screws
Now, let’s get into the nitty-gritty of removing the bathroom light fixture.
Step 1: Remove the Bulbs
Start by unscrewing and removing the light bulbs from the fixture. This will make it easier to work on the fixture itself.
Step 2: Access the Fixture
Most bathroom light fixtures have a cover or plate that conceals the wiring and screws. Gently remove this cover by either twisting it counterclockwise or releasing the clips holding it in place.
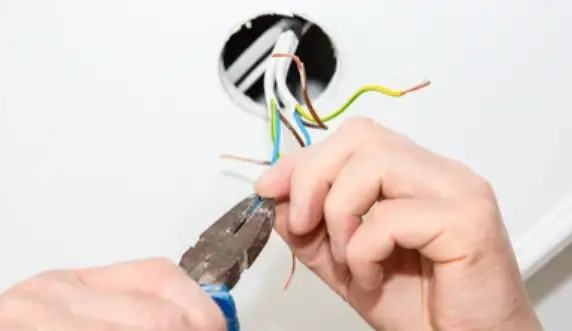
Step 3: Disconnect the Wiring
Carefully disconnect the wires attached to the fixture. You may need to use wire nuts or connectors, depending on how the fixture is wired.
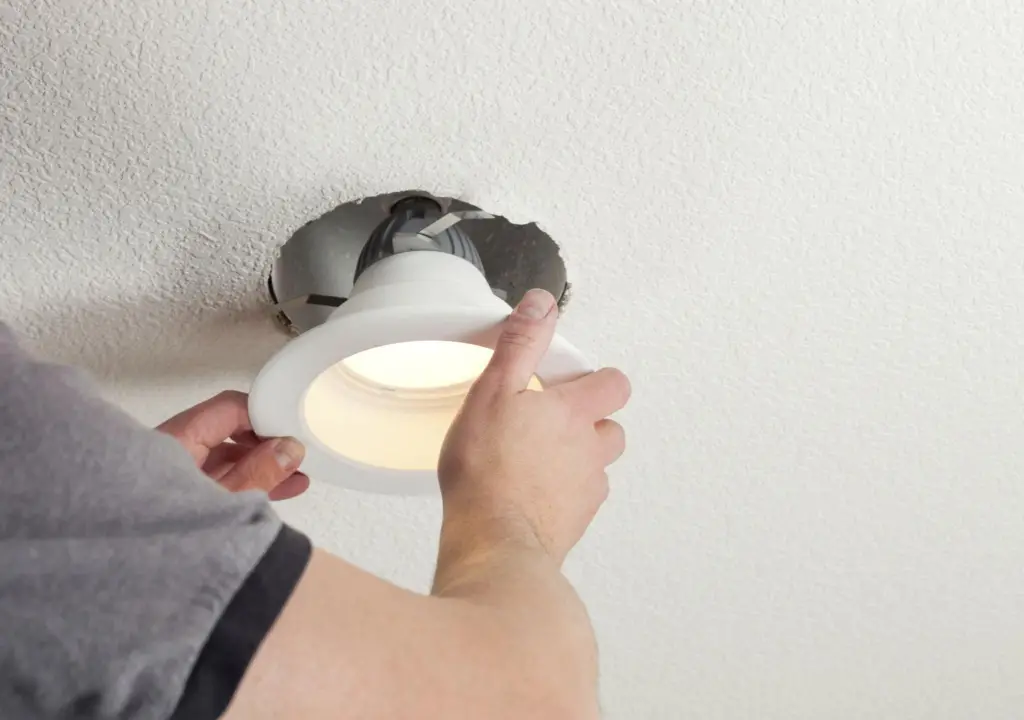
Step 4: Detach the Fixture
With the wiring disconnected, you can now remove the fixture from the wall or ceiling. Some fixtures may have a sliding mechanism or clips that you can release.
Step 5: Patching and Cleanup
After removing the fixture, you may need to patch up any holes or marks left on the wall or ceiling. Once patched, you can repaint the area to restore its appearance.
Common Problems and Solutions
During the process of removing or reinstalling your bathroom light fixture without screws, you may encounter common issues. Don’t fret; here are some troubleshooting solutions to help you navigate these problems:
- Stubborn Fixture Cover: If the fixture cover won’t budge, gently tap it with a rubber mallet or the handle of your screwdriver to loosen it. Avoid using excessive force, which could cause damage.
- Stuck or Stripped Wires: If wires are stuck or stripped, carefully use needle-nose pliers to grip and pull them gently. If they are stripped, trim the damaged part and re-strip for a secure connection.
- Rusted or Corroded Hardware: Spray rusted or corroded screws or bolts with penetrating oil (e.g., WD-40) and let it sit for a few minutes. Then, use your screwdriver or pliers to remove them.
- Fixture Won’t Detach: If the fixture itself is stuck to the ceiling or wall, try gently rocking it back and forth while applying upward pressure. Avoid excessive force, as it could damage the fixture or mounting surface.
- Wire Confusion: If you didn’t label wires and are unsure which ones go where consult the fixture’s manual (if available) or an electrician for guidance. Never guess the wiring; it can lead to dangerous situations.
- Uneven Mounting Surface: If the mounting surface is uneven, use shims or spacers to level it before reinstallation. This ensures the fixture sits flush against the wall or ceiling.
- Broken Components: If any part of the fixture breaks during removal, assess whether it’s replaceable. Contact the manufacturer or consider replacing the entire fixture if necessary.
- Flickering or Non-Functioning Fixture: After reinstallation, if the light flickers or doesn’t work, double-check the wiring connections. It’s easy to miss a wire or make an incorrect connection.
- Inadequate Support: For heavy fixtures, ensure that the mounting hardware and support structure can handle the weight. Reinforce as needed to prevent the fixture from falling.
- Exposed Wires: After reinstalling the fixture, ensure that no wires are exposed or in contact with the fixture itself. Use electrical tape or wire connectors to insulate and secure all connections.
- Mismatched Fixture: If you accidentally purchased a fixture with different wiring or mounting requirements, consult the manufacturer’s instructions or seek professional help to adapt it to your setup.
- Ceiling or Wall Damage: If the fixture removal process causes damage to your ceiling or wall, repair the surface before reinstallation. Patching and repainting may be necessary.
Remember that patience and careful problem-solving are key to successfully addressing common issues during the removal or reinstallation of your bathroom light fixture.
Maintenance Tips
Once you’ve successfully removed and reinstalled your bathroom light fixture without screws, it’s essential to maintain it properly to ensure it continues to illuminate your space effectively and safely. Here are some maintenance tips to extend the life of your bathroom light fixture:
- Regular Cleaning: Dust and dirt can accumulate on the fixture’s surface, diminishing its brightness. Clean the fixture periodically with a soft, lint-free cloth or a feather duster. Avoid abrasive materials that could scratch the finish.
- Use the Right Bulbs: Ensure you use the correct type and wattage of bulbs recommended by the fixture manufacturer. Using bulbs with higher wattage than recommended can lead to overheating and reduce the fixture’s lifespan.
- Inspect Wiring Annually: Once a year, inspect the wiring and connections for any signs of wear, damage, or loose wires. If you notice any issues, address them promptly to prevent electrical problems.
- Check for Loose Components: Periodically check for loose screws, bolts, or other components in the fixture. Tighten them as needed to maintain the fixture’s stability.
- Keep Vents Clear: If your fixture has vents or heat dissipation features, ensure they are not obstructed by dust or debris. Clearing these vents will help prevent overheating.
- Clean or Replace Shades: If your fixture has shades or covers, remove and clean them as needed. Replace damaged or discolored shades to maintain a uniform light quality.
- Inspect Mounting Hardware: Examine the mounting hardware and support structure for any signs of weakness or corrosion. Reinforce or replace components as necessary.
- Check for Moisture: Bathrooms can be humid environments. Ensure that no moisture is entering the fixture, as it can damage electrical components. Seal any gaps or cracks around the fixture.
- Secure Wiring Properly: Ensure that all wiring is neatly secured and away from moving parts within the fixture. Loose or tangled wires can cause issues over time.
- Replace Gaskets or Seals: If your fixture has gaskets or seals to keep out moisture, inspect them for wear and tear. Replace them if they no longer provide a tight seal.
- Schedule Professional Inspection: Consider having an electrician or lighting specialist inspect your bathroom light fixture every few years, especially if it’s an integral part of your bathroom’s design. They can identify potential issues you might have missed.
- Update the Fixture: If your bathroom’s decor changes, or if the fixture is outdated, consider upgrading to a more energy-efficient and aesthetically pleasing fixture.
By following these maintenance tips, you can maximize the lifespan of your bathroom light fixture and ensure that it continues to provide efficient and safe lighting for your bathroom space. Regular care and attention will help you avoid unexpected problems and keep your bathroom well-lit and inviting.
Frequently Asked Questions
Can I reuse the same fixture after removal?
Yes, you can reinstall the same fixture if it’s in good condition and suits your design preferences.
Do I need any special skills to remove a bathroom light fixture without screws?
While basic DIY skills are helpful, this task can be completed by most homeowners with patience and caution.
Can I remove a fixture from a tiled surface?
Yes, you can remove a fixture from a tiled surface. Just be extra careful not to damage the tiles in the process.
What if I’m not comfortable with electrical work?
If you’re unsure about electrical work, it’s best to hire a professional electrician to remove the fixture safely.
How do I find the right replacement fixture?
Measure the dimensions of your old fixture and choose a new one that fits the same space. Consider the style and type of lighting you want for your bathroom.
Is it safe to remove the fixture without turning off the power?
No, it’s essential to turn off the power to the bathroom before attempting to remove the fixture to avoid electrical hazards.
Conclusion
Removing a bathroom light fixture without screws may seem challenging at first, but with the right guidance, it’s a manageable DIY task. Remember to prioritize safety, turn off the power, and follow the steps outlined in this guide. Soon, you’ll have your fixture removed and can enjoy the benefits of a well-lit bathroom.
