
When embarking on a home improvement or DIY project, choosing the right fasteners is crucial. If you’re dealing with plasterboard, you might be wondering, “Can you use wood screws in plasterboard?” In this informative guide, we will explore this subject in depth, offering you all the vital information necessary to make a knowledgeable decision.
Can You Use Wood Screws in Plasterboard?
Yes, you can use wood screws in plasterboard, but there are some important considerations to keep in mind. Plasterboard is not as sturdy as solid wood, so you need to choose the right screws and follow the proper techniques to ensure a secure and long-lasting installation.
Installing Wood Screws in Plasterboard
1. Know Your Materials
Before we dive into the world of screws and DIY projects, it’s essential to get well-acquainted with the materials you’ll be working with. In this section, we’ll explore the fundamental aspects of wood, plasterboard, and the screws designed to hold them together.
Differentiating between Wood and Plasterboard
- Wood:
Wood, the time-tested building material, is known for its strength, durability, and versatility. It comes in various types, each with its own unique properties, such as hardwoods like oak and softwoods like pine. Understanding the type of wood you’re working with is crucial for choosing the right screws.
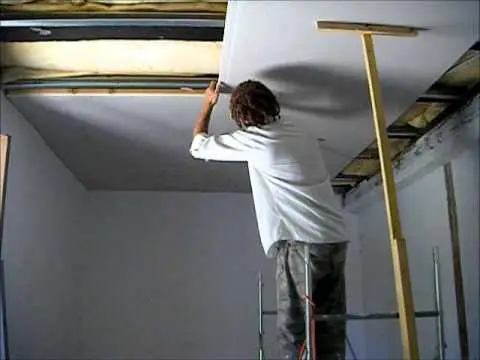
- Plasterboard (Drywall):
Plasterboard, also known as drywall, is a widely used material for interior walls and ceilings. It consists of a gypsum core encased in paper. It’s prized for its ease of installation and versatility in creating interior spaces.
The Characteristics of Wood Screws
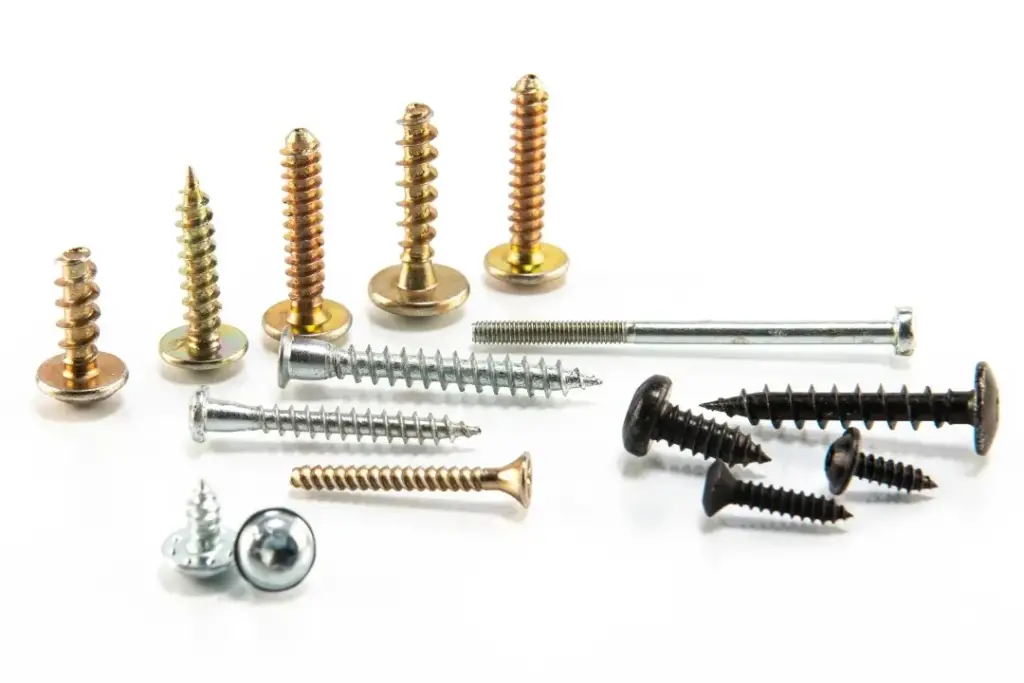
Wood screws are designed specifically for use with wood. They have several distinguishing characteristics:
- Thread Design: Wood screws typically have a coarser thread pattern that offers strong grip and pull-out resistance in wood.
- Point Styles: The type of point can vary, but common options include sharp points for easy penetration and self-tapping points that eliminate the need for pre-drilling.
- Head Types: Wood screws come with various head types, such as flat heads, round heads, and countersunk heads, each serving specific purposes.
The Characteristics of Plasterboard Screws
Plasterboard screws, on the other hand, are tailored for use with drywall or plasterboard. Their characteristics include:
- Thread Design: Plasterboard screws usually have finer threads that work well with the softer gypsum core of drywall.
- Bugle Head: These screws often feature a bugle head, which is designed to sit flush with the drywall’s surface to facilitate finishing.
- Specialized Coatings: Some plasterboard screws come with special coatings to resist corrosion.
The Importance of Compatibility
The key to a successful DIY project lies in compatibility. Mixing and matching the wrong screws with the wrong materials can lead to a host of problems, from weak structural integrity to unsightly finishes. Understanding the characteristics of wood and plasterboard, as well as the screws designed for them, is the first step towards ensuring that your DIY endeavors stand the test of time. In the following sections, we’ll explore when to use wood screws in plasterboard and how to do it effectively.
2. When to Use Wood Screws
Now that we’ve grasped the basics of wood, plasterboard, and their respective screws, let’s delve into the specific scenarios where using wood screws in plasterboard is not only feasible but also advantageous.
Ideal Situations for Using Wood Screws in Plasterboard
- Wooden Frame Attachment: When attaching wooden frames, such as shelves or cabinets, to plasterboard walls, wood screws can be the go-to choice. They provide a secure hold and minimize the risk of the frame coming loose.
- Hanging Light Fixtures: When installing light fixtures that have wooden mounts, opt for wood screws. This ensures a stable and long-lasting fixture attachment to your plasterboard ceiling.
- Heavy Mirror or Artwork Mounting: For heavy mirrors or artworks with wooden frames, wood screws can offer the necessary strength to keep them securely affixed to your plasterboard walls without worrying about shifting or falling.
The Advantages of Using Wood Screws in Specific Scenarios
While wood screws might not seem like the obvious choice for plasterboard, they do offer some unique advantages in certain situations:
- Sturdiness: Wood screws are exceptionally sturdy, making them ideal for heavy-duty applications. When you need to secure substantial items to plasterboard, their superior holding power can’t be overlooked.
- Ease of Use: Using wood screws in plasterboard can be straightforward, especially if you’re already familiar with working with wood. They often require less effort to drive in and can be more forgiving in terms of alignment.
- Cost-effective: If you have wood screws readily available, choosing them over plasterboard screws for compatible tasks can be a cost-effective decision without compromising performance.
Limitations and Precautions
Despite their advantages, it’s essential to be aware of the limitations and take necessary precautions when using wood screws in plasterboard.
- Pilot Holes: Always pre-drill pilot holes when using wood screws in plasterboard to prevent wall damage and ensure a secure fit.
- Over-Tightening: Be cautious not to over-tighten wood screws, as this can lead to plasterboard cracking or the screws pulling through.
- Weight Considerations: While wood screws can handle the substantial weight, it’s crucial to assess the load and use appropriate anchors if necessary to distribute the weight evenly.
- Compatibility: Ensure that the wood screws you choose are compatible with the thickness of your plasterboard and the weight of the object you’re attaching.
In the next sections, we’ll delve deeper into the types of wood screws that work best with plasterboard, as well as the step-by-step process for using them effectively while maintaining safety and structural integrity.
3. Types of Wood Screws
When it comes to using wood screws in plasterboard, not all screws are created equal. In this section, we’ll explore the diverse world of wood screws, examine which types are suitable for plasterboard, and discuss the crucial factors to consider when selecting the right wood screws for your project.
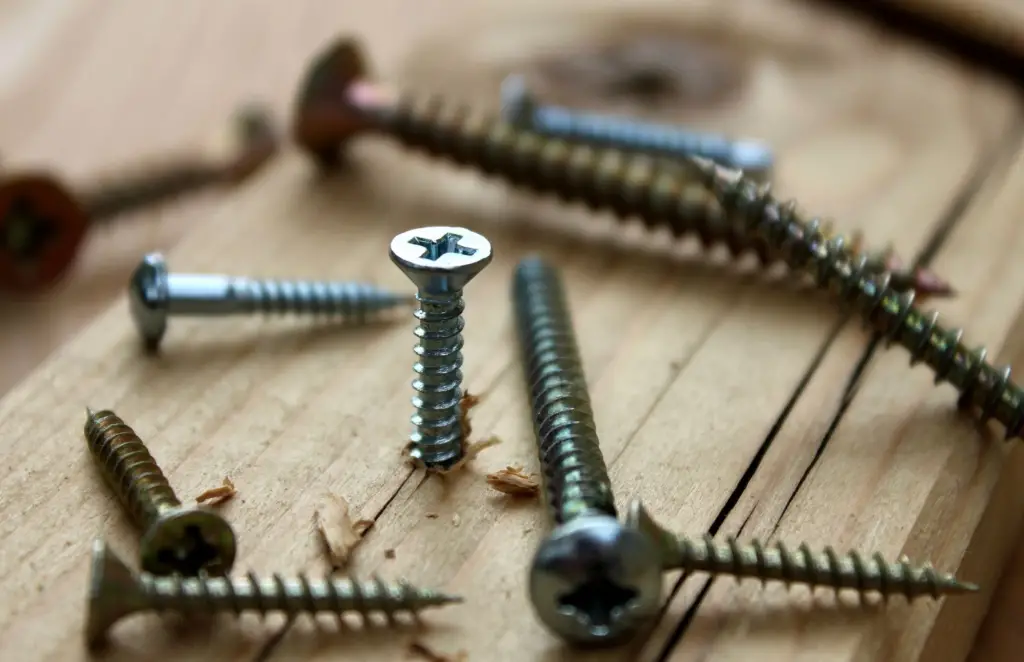
Exploring the Various Types of Wood Screws Available
Wood screws come in a multitude of varieties, each designed with specific features to suit different applications. Some common types include:
- Flathead Wood Screws: These have a flat head with a single slot or a Phillips drive and are often used for countersinking to create a flush finish.
- Roundhead Wood Screws: Featuring a rounded or domed head, these screws are suitable for applications where a flush finish is not necessary.
- Pan Head Wood Screws: These screws have a slightly rounded head with a flat underside. They’re often used in applications where the screw head should sit slightly above the surface.
- Self-Tapping Wood Screws: Equipped with a sharp point, these screws can drill their own pilot hole, making them convenient for quick installations.
- Wood Screws with Thread Variations: Some wood screws have unique thread designs, such as double-threaded or serrated threads, offering increased grip and stability.
Which Wood Screws Are Suitable for Plasterboard?
While wood screws are primarily intended for wood, there are specific types that work well with plasterboard. When choosing wood screws for plasterboard, consider these options:
- Plasterboard Screws (Drywall Screws): These screws are specifically designed for plasterboard applications. They feature fine threads and often have bugle heads, making them an excellent choice for attaching items to drywall.
- Fine-Thread Wood Screws: Wood screws with fine threads can also be used in plasterboard, as their threading is compatible with the softer material.
Factors to Consider When Selecting the Right Wood Screws
Selecting the right wood screws for your plasterboard project involves several critical factors:
- Screw Length: Ensure that the screws are long enough to securely penetrate both the plasterboard and any underlying wooden framing or studs.
- Thread Type: Choose screws with fine threads for plasterboard to avoid damaging the material. Coarse threads are more suitable for dense wood.
- Head Type: Depending on whether you want a flush or slightly raised finish, select the appropriate head type, such as flathead, roundhead, or panhead.
- Material Compatibility: Check that the wood screws you choose are made from materials that resist corrosion, especially if they will be exposed to moisture.
- Load-Bearing Capacity: Consider the weight of the item you’re attaching and choose screws with an appropriate load-bearing capacity.
By taking these factors into account and understanding the various types of wood screws available, you can make an informed decision when selecting the right screws for your plasterboard project. In the following sections, we’ll guide you through the step-by-step process of preparing your workspace and effectively using wood screws in plasterboard applications.
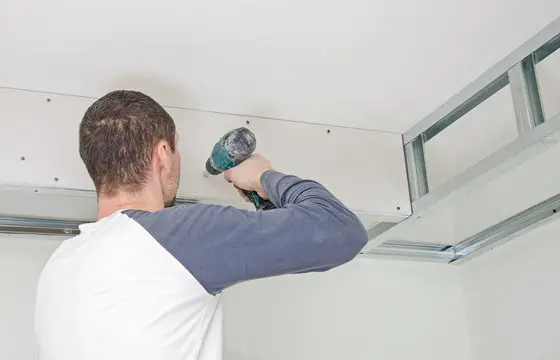
4. Preparing Your Workspace
The foundation for a successful project begins with proper preparation. In this section, we’ll guide you through the essential steps of preparing your workspace for using wood screws in plasterboard.
Gathering the Necessary Tools and Materials
Prior to commencing work with wood screws and plasterboard, it is essential to ensure you have the necessary tools and materials readily available. Here’s what you’ll need:
- Wood Screws: Ensure you have an ample supply of wood screws suitable for plasterboard applications.
- Power Drill: A power drill will be your best friend for driving screws efficiently.
- Screwdriver Bits: Select the appropriate screwdriver bits that match the screw heads you’ll be using, whether they are Phillips, flathead, or another type.
- Pilot Hole Drill Bits: Choose the right-sized drill bits for creating pilot holes in your plasterboard.
- Measuring Tape and Pencil: For accurate measurements and marking.
- Level: To ensure that your fixtures or items are aligned correctly.
- Safety Gear: Wear safety glasses and, if necessary, gloves to protect yourself during the project.
- Stud Finder: If your project involves attaching items to wooden framing or studs behind the plasterboard, a stud finder is essential for locating them.
- Anchors (if required): Depending on your project’s weight, you may need anchors in addition to wood screws for added support.
Measuring and Marking for Precise Screw Placement
Precision is key when working with wood screws in plasterboard. Here’s how to ensure precise screw placement:
- Measure Twice: Before drilling any holes, measure and mark the exact positions where you want to insert the screws. Double-check your measurements to avoid errors.
- Leveling: If your project involves items that need to be leveled, use a level to mark straight lines or ensure correct alignment.
- Stud Location: If you’re attaching items to wooden framing or studs, use a stud finder to locate them accurately. Mark their positions for screw placement.
Ensuring a Safe and Clean Work Environment
Safety and cleanliness are essential for a successful project.
- Safety: Prioritize safety by wearing appropriate gear, including safety glasses and gloves. Be cautious when using power tools, and follow all safety instructions.
- Cleanliness: Keep your workspace tidy by removing any debris or obstacles that might hinder your progress. A clean area ensures you can work more efficiently.
- Ventilation: If you’re working indoors, ensure adequate ventilation to disperse any dust or fumes generated during the project.
By gathering the necessary tools and materials, measuring and marking accurately, and maintaining a safe and clean workspace, you’ll set the stage for a smooth and successful wood screw installation in plasterboard. In the upcoming sections, we’ll guide you through the step-by-step process of creating pilot holes, inserting screws, and securing your fixtures effectively.
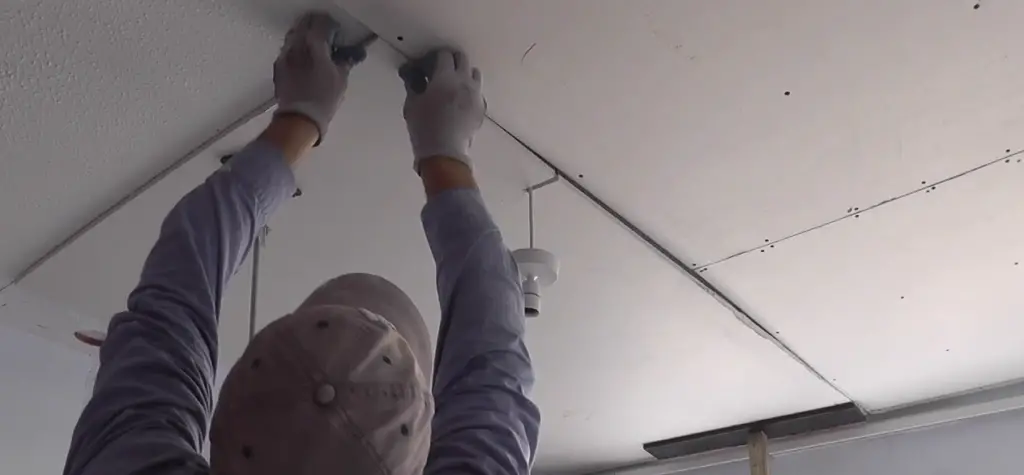
5. Step-by-Step Guide
In this section, we’ll take you through a step-by-step guide on how to use wood screws in plasterboard effectively. Each subsection will provide valuable insights and techniques to ensure a secure and successful installation.
Pilot Hole Preparation
Before diving into screw insertion, let’s first explore the critical step of pilot hole preparation.
The Importance of Pilot Holes
Pilot holes are small, pre-drilled holes that serve several essential functions:
- Preventing Cracks: Creating a pilot hole helps prevent the plasterboard from cracking or splitting when the screw is inserted.
- Ease of Insertion: Pilot holes make it easier to drive screws into the plasterboard, ensuring a smoother and more controlled process.
- Accurate Placement: They help maintain accurate screw placement, preventing screws from veering off target.
How to Determine the Appropriate Pilot Hole Size
To determine the right pilot hole size, consider these factors:
- Screw Diameter: Measure the diameter of the wood screw you’ll be using.
- Plasterboard Thickness: Take into account the thickness of the plasterboard.
- Wood Type (if applicable): If the screw will penetrate the wood behind the plasterboard, consider its density.
Once you have these measurements, you can typically choose a drill bit that matches the screw diameter or is slightly smaller. However, it’s crucial not to make the pilot hole too large, as it may compromise the screw’s grip.
Tools and Techniques for Creating Pilot Holes
To create pilot holes, follow these steps:
- Attach the appropriate drill bit to your power drill.
- Position the drill bit on the marked spot for the screw.
- Apply gentle, even pressure to the drill and slowly create the pilot hole. Be careful not to apply too much force, as this can damage the plasterboard.
- Ensure that the pilot hole is deep enough to accommodate the screw but not excessively deep.
Screw Insertion
With pilot holes prepared, let’s move on to the crucial step of inserting wood screws into the plasterboard.
Inserting Wood Screws into Plasterboard
- Place the wood screw on the screwdriver bit or in the drill’s chuck.
- Align the screw with the pilot hole.
- Start the screwing process gently to ensure it follows the pilot hole path.
- Gradually increase the speed and pressure as the screw advances into the plasterboard.
Achieving the Right Depth and Angle
- Drive the screw until it’s flush with the plasterboard surface or slightly countersunk, depending on your project’s requirements.
- Maintain a perpendicular angle to the plasterboard while driving the screw to ensure it goes in straight and securely.
Common Mistakes to Avoid During Screw Insertion
- Avoid over-tightening, as it can lead to plasterboard damage or the screw pulling through.
- Ensure the screw goes into the pilot hole smoothly; forcing it can cause cracks.
Securing the Wood
After successfully inserting the screw, it’s crucial to secure the wood for a strong and stable hold.
Ensuring a Strong and Secure Hold
- Confirm that the wood is securely attached to the plasterboard without wobbling or shifting.
- Check that the fixture or item is level and aligned as intended.
Properly Tightening Wood Screws in Plasterboard
- Use a screwdriver or power drill with a clutch setting to prevent over-tightening.
- Ensure the screw is snug, holding the wood firmly without causing any damage.
Tips for Preventing Over-Tightening and Damage
- If using a power drill, set it to a lower torque setting to avoid damaging the plasterboard or causing the screw to strip.
- If you feel resistance while tightening the screw, stop immediately to prevent damage.
By following these steps and techniques, you can successfully prepare pilot holes, insert wood screws, and secure your fixtures or items in plasterboard while minimizing the risk of damage or errors.
6. Safety Measures
Working with screws and plasterboard requires careful attention to safety to ensure a successful and injury-free project. In this section, we’ll outline the necessary safety gear and precautions to minimize the risk of accidents and injuries.
Safety Gear and Precautions When Working with Screws and Plasterboard
- Safety Glasses: Always wear safety glasses to protect your eyes from flying debris, especially when drilling pilot holes or driving screws.
- Gloves: Use gloves to safeguard your hands against potentially sharp edges or splinters from wood screws or plasterboard.
- Hearing Protection: If using power tools, consider wearing hearing protection, such as earplugs or earmuffs, to reduce noise-related risks.
- Dust Mask: If your project generates dust, like when drilling or cutting plasterboard, wear a dust mask to prevent inhaling particles.
- Proper Footwear: Ensure you wear appropriate footwear with good traction to prevent slips or falls, especially if working on ladders or elevated surfaces.
- Sturdy Ladder: If your project involves heights, use a sturdy ladder or scaffold that’s in good condition and set up on a stable surface.
- Work Area Lighting: Adequate lighting in your workspace ensures clear visibility and reduces the chances of accidents.
- Tool Maintenance: Regularly inspect and maintain your tools to ensure they are in proper working condition, reducing the risk of malfunctions or accidents.
How to Minimize the Risk of Accidents and Injuries
- Plan Ahead: Plan your project thoroughly, including the type of screws you’ll use, the locations of pilot holes, and safety measures.
- Clear Work Area: Remove any clutter, tripping hazards, or unnecessary items from your work area to create a safe and organized workspace.
- Secure Plasterboard: Ensure that plasterboard panels are securely attached to framing or studs to prevent them from falling or shifting during work.
- Beware of Wiring and Pipes: Before drilling, be aware of the location of electrical wiring and plumbing pipes in the walls to avoid damaging them.
- Steady Footing: Maintain stable footing while working on ladders or elevated surfaces. Do not overreach, as this can lead to falls.
- Proper Ladder Usage: When using a ladder, follow proper ladder safety guidelines, including using both hands and maintaining three points of contact.
- Tool Control: Keep control of your tools and avoid letting them dangle or hang from your belt, as they can pose safety hazards.
- Secure Fixtures: If your project involves fixtures like shelves or cabinets, ensure they are securely fastened to prevent them from falling after installation.
- Work with a Buddy: Whenever possible, have someone nearby to assist or call for help in case of emergencies.
- First Aid Kit: Keep a basic first aid kit nearby with essential supplies in case of minor injuries.
By following these safety gear recommendations and precautions, you can significantly reduce the risk of accidents and injuries while working with screws and plasterboard. Prioritizing safety ensures that your DIY projects are not only successful but also safe for you and those around you.
Conclusion
Using wood screws in plasterboard is possible, but it requires the right screws, techniques, and precautions. By following the guidelines provided in this comprehensive guide, you can confidently tackle your DIY projects and ensure secure and reliable installations.
