
When it comes to building a fence, the size of the screws you use plays a significant role in the fence’s overall strength and longevity. Using the wrong size screws can lead to instability, warping, and other issues that can affect the security and appearance of your fence.
In this article, we will provide expert guidance on what size screws for fence pickets. We’ll cover various aspects, including screw size, material, and tips for a successful fence project. By the end of this guide, you’ll have all the knowledge you need to make informed decisions about your fence construction or repair project.
What Size Screws for Fence Pickets
Selecting the correct screw size is paramount when attaching fence pickets. The right screw size ensures a secure and long-lasting fence installation. In this section, we’ll explore various factors to consider when determining the ideal screw size, including picket material, fence height, environmental factors, screw length, diameter, and head type.
Factors to Consider
Before choosing a specific screw size, it’s essential to take several factors into account to ensure a successful fence installation.
- Picket Material
Different picket materials require different screw sizes. Wood, vinyl, and metal pickets each have unique characteristics and thicknesses. The type of material you’re working with will influence the screw size needed to secure the pickets effectively.
- Fence Height
The height of your fence has a direct impact on the size of screws required. Taller fences are subject to greater wind forces, and as a result, thicker and longer screws may be necessary to provide adequate stability and prevent picket sagging.
- Environmental Factors
Consider the local climate and environmental conditions. Areas with high humidity, heavy rainfall, or extreme temperature fluctuations may require screws with better corrosion resistance. Selecting screws that can withstand these environmental factors is crucial for long-term fence durability.
Screw Length
The length of the screw is a critical factor in ensuring a secure attachment of fence pickets to support rails.
- Matching Picket Thickness
The screw length should match the thickness of the picket. Using screws that are too short may not provide enough grip, while excessively long screws can penetrate through the picket, compromising its structural integrity.
- Penetrating Support Rails
Consider how far the screw needs to penetrate the support rails. It’s essential to ensure that the screw goes deep enough to firmly hold the picket but not so deep that it damages the rail or protrudes on the other side.
Screw Diameter
The diameter of the screw affects both structural integrity and holding power.
- Achieving Structural Integrity
Selecting the appropriate diameter is crucial for maintaining the structural integrity of the fence. Thicker pickets may require larger diameter screws to ensure a secure attachment.
- Balancing Holding Power
Although a larger screw diameter typically offers increased holding power, it’s crucial to find a harmonious balance. Using excessively thick screws may split the picket or the support rail. It’s crucial to choose a diameter that suits the picket material and thickness.
Head Type
The head type of the screw impacts both the installation process and the fence’s overall appearance.
- Countersunk vs. Bugle Head
Countersunk screws have heads that sit flush with the surface, providing a cleaner and more polished look. Bugle head screws, on the other hand, have slightly rounded heads. The choice between these two head types can affect the aesthetics of your fence.
- Impact on Aesthetics
Consider how the screw head type will impact the appearance of your fence. Some prefer the seamless look of countersunk heads, while others may not mind the slightly raised appearance of bugle heads.
By carefully considering these factors, you can make an informed decision when choosing the right screw size for your fence pickets. In the next section, we’ll provide a step-by-step guide on how to select and install screws effectively.
Step-by-Step Guide: How to Choose and Install Screws for Fence Pickets
Securing fence pickets with the right screws is essential for a durable and stable fence installation. Follow these steps to ensure your fence stands the test of time.
Gather the Necessary Tools and Materials
Before you begin, gather all the tools and materials you’ll need:
- Screws: Ensure you have the appropriate type, size, and quantity of screws for your fence project.
- Screwdriver or Drill: Depending on your preference, use a screwdriver or a drill with the correct bit for driving the screws.
- Measuring Tape: For accurately measuring picket thickness and spacing.
- Pencil or Chalk: To mark picket placement and screw positions.
- Safety Gear: Wear safety glasses and gloves to protect yourself during installation.
- Optional: Pre-Drill Bit: If needed, have a pre-drill bit on hand for pilot holes.
Assess Picket Material and Thickness
Examine the fence pickets to determine their material and thickness. This will guide your choice of screw size and type.
Determine the Right Screw Length
Measure the thickness of the pickets and select screws that are long enough to penetrate the pickets and secure them to the support rails without protruding excessively.
Select the Appropriate Screw Diameter
Consider the material and thickness of the pickets when choosing the screw diameter. Thicker pickets may require larger-diameter screws for added stability.
Choose the Head Type
Decide whether you prefer countersunk or bugle head screws based on your aesthetic preferences.
Pre-Drill Holes (When Necessary)
For hardwood or brittle materials, pre-drilling pilot holes can help prevent splitting or cracking. Use a pre-drill bit that matches the diameter of your screws.
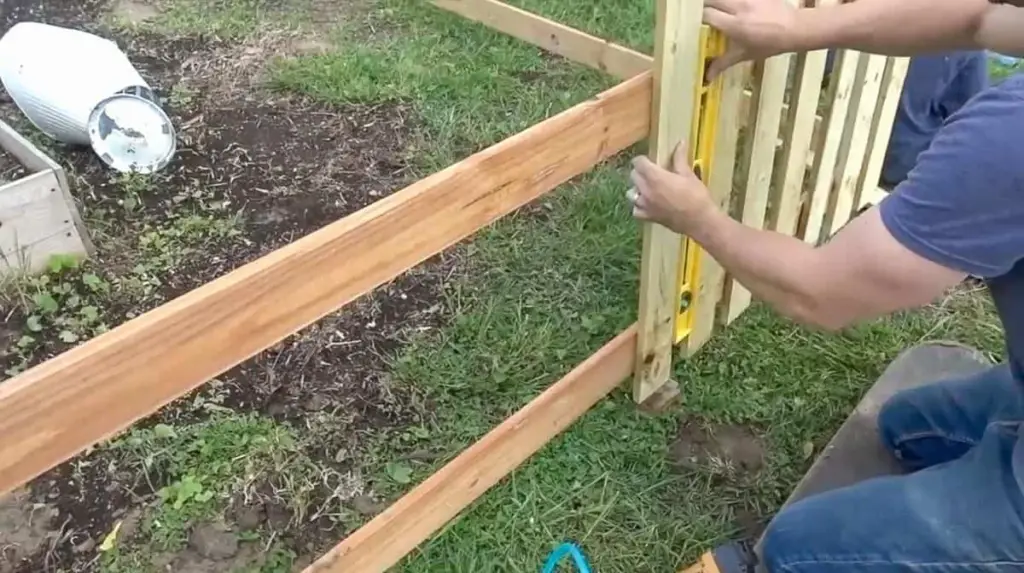
Position and Attach Pickets
- Mark the placement of each picket on the support rails using a pencil or chalk.
- Position the picket against the rails, aligning it with the marks.
- Insert the screw through the picket and start driving it into the support rail. Use your selected screwdriver or drill.
- Ensure the screw goes in straight and securely fastens the picket to the rail.
- Repeat this process for all pickets along the fence line, maintaining consistent spacing and alignment.
Final Checks and Adjustments
- Inspect the entire fence to ensure all pickets are securely fastened.
- Check for any loose screws and tighten them as needed.
- If you encounter screws that are difficult to tighten or strip, replace them promptly.
- Conduct a final visual inspection to ensure the fence looks level and aesthetically pleasing.
By following these step-by-step instructions, you can choose the right screws and install them correctly for a fence that not only looks great but also stands strong against the test of time. Proper installation and maintenance will ensure the durability of your fence for years to come.
Maintenance Tips for Screwed Fence Pickets
Ensuring the long-term stability and appearance of your fence requires regular maintenance. Fence pickets secured with screws can sometimes become loose or damaged over time due to exposure to the elements and wear and tear. Here are some essential maintenance tips to keep your fence in top condition:
Inspecting for Loose Screws
Regular inspections are key to identifying and addressing loose screws before they become a more significant issue. Here’s how to check for loose screws:
- Visual Inspection: Walk along your fence line and visually inspect the pickets for any signs of screws that have come loose or are protruding.
- Manual Check: Gently push on each picket to see if it wobbles or feels insecure. Loose screws may allow the picket to move.
- Listen for Rattles: If you hear rattling sounds when tapping on the pickets, it may indicate loose screws.
Tightening Loose Screws
If you find loose screws during your inspection, follow these steps to tighten them:
- Tools: Use a screwdriver or a drill with the appropriate bit to tighten loose screws.
- Secure the Picket: Hold the picket in place to prevent it from moving while tightening the screw.
- Tighten Gradually: Gently and gradually tighten the loose screw until it is snug against the picket without over-tightening, which can cause damage.
- Repeat as Needed: Continue this process for all loose screws along the fence line.
Replacing Damaged Screws
In some cases, screws may become damaged or corroded beyond repair. Here’s how to replace damaged screws:
- Identify Damaged Screws: Locate screws that are rusted, stripped, or otherwise compromised.
- Remove the Old Screw: Use a screwdriver or drill to carefully remove the damaged screw from the picket.
- Select a Replacement Screw: Choose a new screw of the same type, size, and length as the original.
- Secure the New Screw: Insert the replacement screw into the same hole and securely fasten it to the picket.
- Check for Stability: Ensure the picket is stable and secure after replacing the damaged screw.
Seasonal Maintenance
Performing seasonal maintenance can help extend the life of your fence and prevent issues caused by weather and climate changes:
- Regular Cleaning: Periodically clean your fence to remove dirt, debris, and mildew. Use a gentle detergent and a soft brush or pressure washer, depending on the material.
- Paint or Seal Wooden Fences: If you have a wooden fence, consider applying protective paint or sealant to prevent moisture penetration and wood rot.
- Inspect for Damage: After harsh weather conditions or extreme temperature changes, conduct a thorough inspection for any damage to pickets, screws, or support rails.
- Tighten as Needed: Check for any newly loosened screws and tighten them promptly.
- Lubricate Hinges and Latches: If your fence has gates, lubricate the hinges and latches to ensure smooth operation.
By following these maintenance tips, you can keep your fence in excellent condition, prolong its lifespan, and maintain its aesthetic appeal. Regular inspections and timely repairs will help prevent more significant issues down the road.
Frequently Asked Questions

Can I use nails instead of screws for fence pickets?
Yes, you can use nails for attaching fence pickets, but screws generally offer better stability and durability. If you choose to use nails, opt for ring-shank nails, which have better-holding power than common nails.
How far apart should I place the screws when attaching pickets?
It’s recommended to place screws approximately 6 to 8 inches apart along the top and bottom rail of your fence for secure attachment.
Can I reuse old screws when repairing my fence?
Reusing old screws is not advisable, as they may be corroded or damaged. It’s best to use new, corrosion-resistant screws for fence repairs to ensure the fence’s longevity.
What type of screwdriver or drill bit should I use for fence screws?
A Phillips or square drive bit is commonly used for fence screws. Ensure your bit matches the screw head type for a secure installation.
How deep should I drive the screws into the pickets?
Screws should be driven flush with the picket surface to ensure a secure fit without damaging the wood.
Can I paint over the screws to match the fence color?
Yes, you can paint over the screws with matching paint to blend them with the fence’s color, providing a more aesthetically pleasing appearance.
Conclusion
Selecting the right screws for your fence pickets is a critical step in ensuring a sturdy and long-lasting fence. Consider factors like screw length, diameter, material, and head type to make the best choice for your project. By following our expert advice and guidelines, you’ll be well-equipped to tackle your fence construction or repair with confidence.
Remember that using the correct screws not only enhances the fence’s structural integrity but also contributes to its overall visual appeal. So, take your time, choose wisely, and enjoy the satisfaction of a beautifully constructed fence that will stand the test of time.
