
Stripped screws can be a real headache, whether you encounter them during a DIY project or while repairing household items. Glue can repair a stripped screw problem. But what kind of glue to repair a stripped screw? There’s a solution that can save the day: the right kind of glue. In this comprehensive guide, we’ll delve into the world of screw repair and explore the best glue options to get your projects back on track. With a focus on practicality, we aim to provide you with the expertise, authority, and trust you need to tackle this issue confidently.
Understanding Stripped Screws
Definition of a Stripped Screw
Before delving into solutions, it’s essential to grasp what a stripped screw is. A stripped screw is a fastener that has suffered damage to its threads, making it challenging or impossible to turn with a screwdriver, wrench, or drill. This damage can manifest as worn-out or deformed threads, rendering the screw ineffective at securing components together.
Causes of Stripped Screws
Understanding the root causes of stripped screws is crucial to prevent future occurrences. Several factors can contribute to screw stripping, including:
- Over-Tightening: Applying excessive force when turning a screw can lead to the threads becoming damaged or sheared off. This often happens when individuals attempt to make a connection too tight, not realizing the harm it causes.
- Using the Wrong Screwdriver: Choosing the incorrect type or size of screwdriver for the screw head can result in poor engagement, causing the screwdriver to slip and strip the screw’s threads.
- Rust and Corrosion: Screws exposed to moisture or corrosive substances can develop rust. As rust forms, it can weaken the screw’s threads, making them more susceptible to damage during turning.
Consequences of Ignoring Stripped Screws
Ignoring stripped screws can lead to a cascade of negative consequences:
- Reduced Structural Integrity: In construction and furniture assembly, stripped screws can result in less stable and less secure connections, leading to wobbly furniture, shaky fixtures, and potential safety hazards.
- Inefficiency: In machinery or appliances, stripped screws can impair functionality, causing devices to malfunction or break down prematurely.
- Costly Repairs: Failing to address stripped screws promptly can necessitate costly repairs or replacements down the line.
- Frustration: Stripped screws can turn a simple DIY project into a time-consuming and frustrating ordeal.
Understanding the causes and consequences of stripped screws is the first step toward effectively addressing this common issue.
What Kind of Glue to Repair a Stripped Screw
Stripped screws are often the result of wear and tear, over-tightening, or using the wrong screwdriver. But fear not; you don’t have to resort to drastic measures like drilling and re-threading. The right glue can be your saving grace. Let’s explore the types of glue you can use to fix a stripped screw:
- Cyanoacrylate (Super Glue)
Cyanoacrylate(Super Glue), commonly known as super glue, is a fast-bonding adhesive that’s perfect for small, lightweight screws. Its quick drying time and strong bond make it an excellent choice for on-the-spot repairs. Apply a small amount to the stripped area, insert the screw, and wait for the magic to happen.
- Epoxy Resin
Epoxy resin is a versatile adhesive that works well on various surfaces and screw sizes. Mix the epoxy according to the instructions, apply it to the stripped screw hole, and insert the screw. The epoxy will create a durable bond once it sets.
- Polyurethane Glue
Polyurethane glue is ideal for outdoor projects or situations where the screw may be exposed to moisture. It expands as it dries, creating a tight seal around the screw. Apply the glue, insert the screw, and let it cure for a secure fix.
- Wood Glue
For stripped screws on wooden surfaces, wood glue is an excellent choice. Apply the glue generously to the hole, insert the screw, and let it dry. This adhesive creates a strong bond within the wood fibers, ensuring a reliable repair.
- Gel-Type Adhesives
Gel-type adhesives, such as those used in craft projects, can also be effective for repairing stripped screws. These adhesives are easy to apply precisely, ensuring that the screw fits snugly into place.
- Threadlocker
Threadlocker is a specialized adhesive designed to prevent screws from loosening due to vibrations. While it won’t repair a stripped screw on its own, it can be used in conjunction with other adhesives to secure the screw in place after repair.
Application Process
Safety Precautions
Before diving into the repair process, it’s crucial to prioritize safety. Stripped screw repairs may involve working with adhesives and tools, so taking appropriate precautions is essential.
Safety Measures:
- Wear protective gear, including safety glasses and gloves.
- Work in a well-ventilated area to avoid inhaling fumes from certain adhesives.
- Keep all tools and adhesives out of the reach of children.
- Follow manufacturer guidelines for the safe use of adhesives.
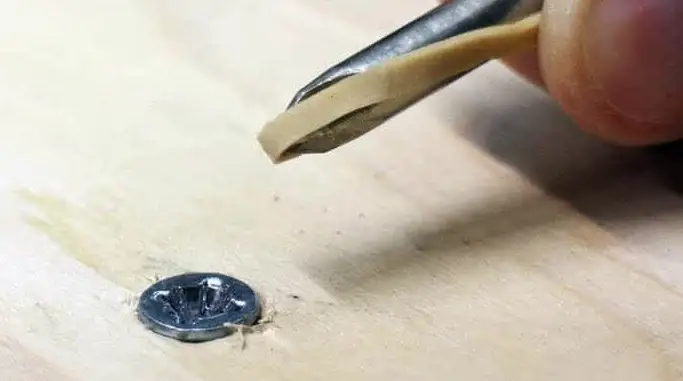
Applying the Chosen Glue
Once safety measures are in place, you can proceed with applying the selected adhesive. The process will vary depending on the type of glue chosen. Follow these general steps:
- Prepare the adhesive as per the manufacturer’s instructions (if applicable).
- Apply a small amount of glue to the stripped screw threads or the surface area where the screw will be inserted.
- Use a brush, toothpick, or a similar tool for precise application.
- Avoid excessive application, as it can lead to messy and ineffective repairs.
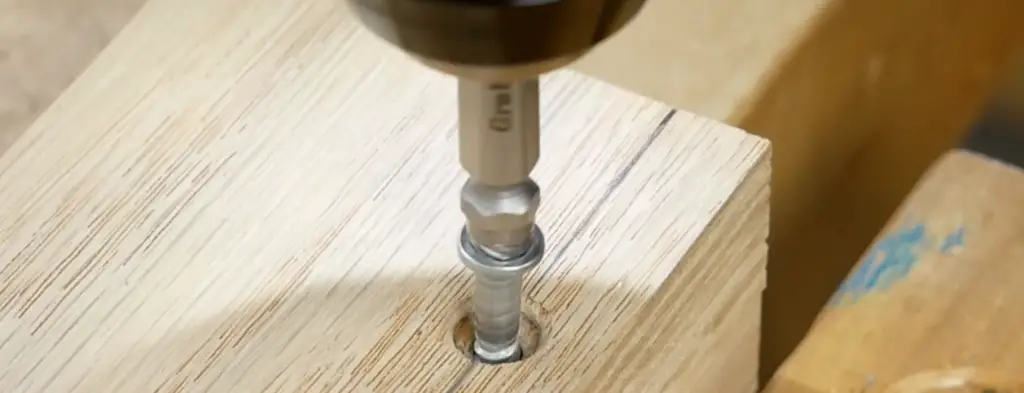
Inserting the Screw
After applying the adhesive, it’s time to insert the screw back into its intended location. Ensure that you:
- Insert the screw gently and steadily to prevent further damage.
- Rotate the screw clockwise to engage it with the adhesive and the material.
- Avoid over-tightening, as it can cause the screw to strip again or damage the bond.
Aligning and Securing the Components
Proper alignment of the components is critical for a successful repair. Depending on the project, you may need to use clamps, vices, or other methods to hold the components in place while the adhesive sets. Ensure that:
- The components are aligned correctly to maintain the intended structure.
- Excess adhesive is wiped away to prevent unsightly residue.
Curing Time and Methods
The curing time for the adhesive will vary depending on the type of glue used. Refer to the manufacturer’s instructions for specific guidance. Generally:
- Epoxy resin may require several hours to cure fully.
- Cyanoacrylate (super glue) cures rapidly within seconds to minutes.
- Wood glue typically requires 24 hours or more for a complete bond.
- Polyurethane glue may have a curing time of several hours to a day.
During the curing process:
- Avoid disturbing or applying stress to the repaired area.
- Maintain proper environmental conditions (temperature and humidity) as specified by the adhesive manufacturer.
- Keep the repaired item stationary to allow the adhesive to set properly.
By following these steps and taking necessary precautions, you can ensure a safe and effective repair of stripped screws using the chosen adhesive.
Troubleshooting
What to Do If the Repair Doesn’t Hold
Sometimes, despite your best efforts, a repaired stripped screw may not hold as expected. In such cases, here’s what you can do:
- Assess the Cause: Determine why the repair failed. Was it due to improper surface preparation, adhesive choice, or application technique?
- Reevaluate the Screw: Examine the condition of the screw. If it’s further damaged, consider replacing it with a new one.
- Repeat the Process: If the screw and surface are still salvageable, you can attempt the repair again with more attention to detail.
Assessing the Bond Strength
To ensure the strength and reliability of the repair, assess the bond carefully:
- Wait for Full Cure: Give the adhesive ample time to cure completely as per the manufacturer’s instructions.
- Test the Screw: Gently apply torque to the screw using the appropriate tool. If it turns without resistance or feels loose, the bond may not be strong enough.
- Check for Flexibility: Depending on the adhesive used, check if the bond can withstand vibrations or stress. Some adhesives may be more flexible than others.
- Conduct Load Tests: For critical applications, consider applying a controlled load or stress to evaluate the repair’s stability.
Repeating the Process If Necessary
If you find that the initial repair didn’t meet your expectations, don’t be discouraged. It’s not uncommon for stripped screw repairs to require a second attempt. Here’s how to proceed:
- Prepare the Surface: Ensure the surfaces are clean, dry, and free from any remnants of the previous repair.
- Choose a Different Adhesive: If you suspect the adhesive choice was the issue, consider trying a different type of glue that may better suit the application.
- Adjust the Technique: Pay extra attention to the application process, making sure to follow the manufacturer’s instructions meticulously.
- Allow Sufficient Curing Time: Ensure the adhesive has ample time to cure fully before subjecting it to stress or load.
- Monitor the Repair: After repeating the process, keep an eye on the repaired area to ensure it holds up over time.
Remember that achieving a successful repair might require some trial and error, especially if you are dealing with unique materials or challenging conditions. Patience and a systematic approach can lead to a secure and long-lasting fix for stripped screws.
Frequently Asked Questions

Can I use regular glue to fix a stripped screw?
Regular household glue is not recommended for repairing stripped screws, as it lacks the strength and durability needed for a secure fix. It’s best to use specialized adhesives like super glue or epoxy resin.
How long does it take for the glue to set?
The drying time varies depending on the type of glue you use. Super glue can set within seconds, while epoxy resin and polyurethane glue may take several hours to cure completely.
Should I clean the stripped screw hole before applying glue?
Yes, it’s essential to remove any debris or old glue from the hole before repairing the stripped screw. A clean surface ensures a better bond.
Can I still remove the screw after it’s been repaired with glue?
In most cases, you can remove the screw if needed, but it may require some effort. The adhesive creates a strong bond, so be prepared to apply force or use tools if necessary.
Are there any safety precautions when using glue for screw repair?
Always follow the manufacturer’s instructions for the adhesive you choose. Use gloves and work in a well-ventilated area, as some adhesives may emit fumes.
What if the screw is stripped in metal or plastic?
While the adhesives mentioned earlier can work on metal or plastic surfaces, you may also consider using a specialized metal epoxy or plastic cement for the best results.
Conclusion
Repairing a stripped screw is a skill every DIY enthusiast should have in their toolkit. With the right glue and a little patience, you can salvage your projects and save money on replacements. Remember to choose the appropriate adhesive for your situation, clean the screw hole thoroughly, and follow safety guidelines. Now, armed with this knowledge, you’re ready to tackle any stripped screw with confidence.
