
When it comes to assembling IKEA furniture, it can be both exciting and slightly daunting. You have a pile of parts and a set of instructions, but there’s one crucial element that often leaves people scratching their heads – the screws. IKEA provides a variety of screws in different sizes, and it’s essential to know which ones to use for a seamless assembly experience. In this comprehensive guide, we’ll delve into the IKEA Screw Size Chart, making your furniture assembly a breeze.
Understanding IKEA Screw Types
Before we dive into the specifics of screw sizes, let’s understand the different types of screws you might encounter during your IKEA furniture assembly:
- Wood Screws (Type A)
These screws are typically used for wooden parts like shelves, table legs, and bed frames.
They have a coarse thread for better grip in wood.
Sizes vary depending on the furniture piece, ranging from 12mm to 60mm.
- Machine Screws (Type B)
Machine screws are used for attaching metal parts or hinges to the furniture.
They have a finer thread and are often accompanied by nuts.
Sizes range from 4mm to 8mm in diameter.
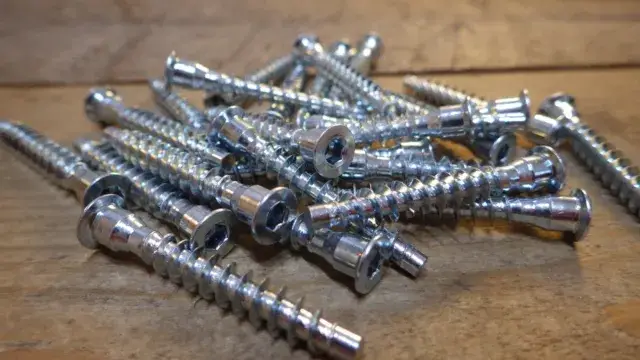
- Cam Screws (Type C)
Cam screws are unique to IKEA furniture and are used to secure cam locks.
They have a specific length, typically 27mm or 30mm.
Deciphering the IKEA Screw Size Chart
Now that we’ve covered the types of screws, let’s break down the IKEA Screw Size Chart:
Screw Length
The screw length is crucial for determining its usability in a particular piece of furniture. It’s often mentioned in millimeters (mm) and varies widely.
Screw Diameter
The diameter of the screw, measured in millimeters (mm), determines its thickness. Matching the right diameter is essential for a secure fit.
Screw Head Type
Screw heads come in different shapes: flat, round, or pan. Understanding the head type helps you choose the right screwdriver for assembly.
Screw Thread
The thread of the screw can be coarse or fine, depending on its intended use. Coarse threads are for wood, while fine threads are for metal.
How to Use the IKEA Screw Size Chart
Now that you know the elements of the IKEA Screw Size Chart, here’s how to use it effectively:
- Identify the Screw Type: Check whether you need wood screws (Type A), machine screws (Type B), or cam screws (Type C) for your assembly.
- Refer to the Screw Length: Measure the length of the screw holes in your furniture and match them with the chart to find the appropriate length.
- Determine the Diameter: Ensure the screw’s diameter fits snugly into the designated holes without damaging the wood or metal.
- Consider the Screw Head: Use the right screwdriver type based on the screw head shape.
- Choose the Correct Thread: Opt for coarse threads for wood components and fine threads for metal parts.
With these steps in mind, you’ll have a much smoother assembly process.
Tips for a Hassle-Free Assembly
To make your IKEA furniture assembly even more straightforward, here are some handy tips:
- Lay out all the parts and screws before starting.
- Use a cordless drill with an adjustable torque setting for speed and precision.
- Follow the assembly instructions step by step, referencing the IKEA Screw Size Chart when needed.
Troubleshooting Common Assembly Issues
Even with a good understanding of IKEA screw sizes and a well-organized approach, assembly issues can still arise. Here are some common problems you might encounter and how to troubleshoot them effectively:
Stripped Screw Holes
Problem: Stripped screw holes occur when the threads in the hole become worn or damaged, making it challenging to secure the screw properly.
Solution:
- Change Screws: Swap out the stripped screw with a slightly larger or longer one if the furniture allows for it.
- Wood Filler: If the hole is in wood, you can fill it with wood filler, let it dry, and then reinsert the screw.
- Toothpicks or Wooden Dowels: Insert toothpicks or wooden dowels into the hole with some wood glue. Once dry, trim the excess and reinsert the screw.
- Thread Repair Kit: Consider using a thread repair kit for more severe cases. These kits can help restore the damaged threads.
Misaligned Parts
Problem: Misaligned parts can lead to wobbly or unstable furniture, making it challenging to complete the assembly correctly.
Solution:
- Check Instructions: Review the assembly instructions carefully to ensure you haven’t missed any steps or misinterpreted any diagrams.
- Loosen Screws: Loosen all screws slightly before tightening them. This can often help realign parts that aren’t fitting together correctly.
- Adjust and Align: Gently adjust and align the misaligned parts. Sometimes, a slight nudge or rotation can make a significant difference.
- Seek Assistance: If the misalignment persists, consider asking a friend or family member for help. Another set of hands can make aligning parts much easier.
Missing Screws
Problem: Discovering that you’re missing screws can be frustrating, as it can halt your assembly progress.
Solution:
- Double-Check Packaging: Look through all the packaging materials, including small bags and compartments, to ensure you haven’t missed any screws.
- Contact IKEA: If you’ve confirmed that screws are indeed missing, contact IKEA’s customer service or visit your nearest IKEA store. They often provide replacements for missing parts.
- Local Hardware Store: In some cases, you may be able to find a suitable replacement at a local hardware store. Be sure to bring one of the existing screws for reference in terms of size and type.
By addressing these common assembly issues, you’ll be better equipped to handle unexpected challenges during your IKEA furniture assembly projects. With the right troubleshooting techniques, you can ensure that your furniture is both sturdy and aesthetically pleasing.
IKEA Furniture Maintenance
Maintaining your IKEA furniture is crucial to ensure its longevity and continued functionality. Two key aspects of maintenance involve periodic tightening of screws and replacing damaged screws:
Periodic Tightening of Screws
Regular maintenance is the key to keeping your IKEA furniture in optimal condition. One of the simplest yet most effective maintenance tasks is the periodic tightening of screws.
Why is this important? Over time, as furniture is used and subjected to various forces, screws can gradually loosen. Loose screws can compromise the stability and structural integrity of the furniture, potentially leading to wobbling or instability.
Maintenance Steps:
- Inspect Regularly: Set aside time for routine inspections of your IKEA furniture. Check for any loose screws by gently trying to wiggle or turn them.
- Tighten Appropriately: If you find loose screws, use the appropriate screwdriver or Allen wrench to snugly tighten them. Avoid overtightening, as it can damage the furniture or screws.
- Focus on High-Use Areas: Pay extra attention to screws in areas that experience more stress, such as table legs, chair joints, or drawer handles.
- Use Thread Lockers: For added security, you can apply a thread locker solution to screws in high-stress areas. This adhesive helps prevent screws from coming loose over time.
By regularly tightening screws, you’ll not only maintain the stability of your furniture but also extend its lifespan, ensuring that it serves you well for years to come.
Replacing Damaged Screws
Even with the best maintenance, screws can sometimes become damaged due to wear and tear, accidents, or overuse. Knowing how to replace damaged screws is an essential part of furniture maintenance.
Why is this important? Damaged screws can compromise the structural integrity of your furniture and affect its appearance. Replacing them promptly is crucial to ensure continued functionality.
Replacement Steps:
- Identify the Damage: Inspect your furniture to identify any screws that are damaged, stripped, or broken.
- Remove the Old Screw: Use the appropriate tool, such as a screwdriver or pliers, to carefully remove the damaged screw. Be gentle to avoid further damage.
- Choose the Right Replacement: Measure the dimensions of the old screw, including length and diameter. Visit a hardware store or order a replacement screw online with the same specifications.
- Install the Replacement: Carefully insert the new screw into the hole, ensuring it’s flush with the surface. Use the appropriate tool to tighten it securely.
By promptly replacing damaged screws, you can prevent further issues and maintain the overall quality of your IKEA furniture.
With these maintenance practices in place, you can enjoy your IKEA furniture for years to come, knowing that it will continue to serve you reliably and look great in your living space.
Frequently Asked Questions
Can I use my screws instead of IKEA screws?
It’s not recommended, as using the wrong screws can compromise the integrity of the furniture and may void the warranty.
How can I tell the difference between wood and machine screws?
Wood screws have a coarser thread and are designed for wood, while machine screws have a finer thread and are meant for metal.
Are IKEA screws metric or imperial?
IKEA primarily uses metric screws, so be sure to have metric-compatible tools on hand.
What do I do if I lose a screw during assembly?
Contact IKEA customer service or visit your nearest IKEA store for replacement screws.
Can I reuse IKEA screws for a different project?
It’s best to use new screws for each assembly to ensure stability and prevent wear and tear.
Conclusion
Assembling IKEA furniture doesn’t have to be a puzzle, especially when you have the IKEA Screw Size Chart at your disposal. With this guide, you’ll confidently tackle any furniture project, ensuring that each screw is in its rightful place. Say goodbye to frustration and hello to a well-constructed piece of furniture.
