
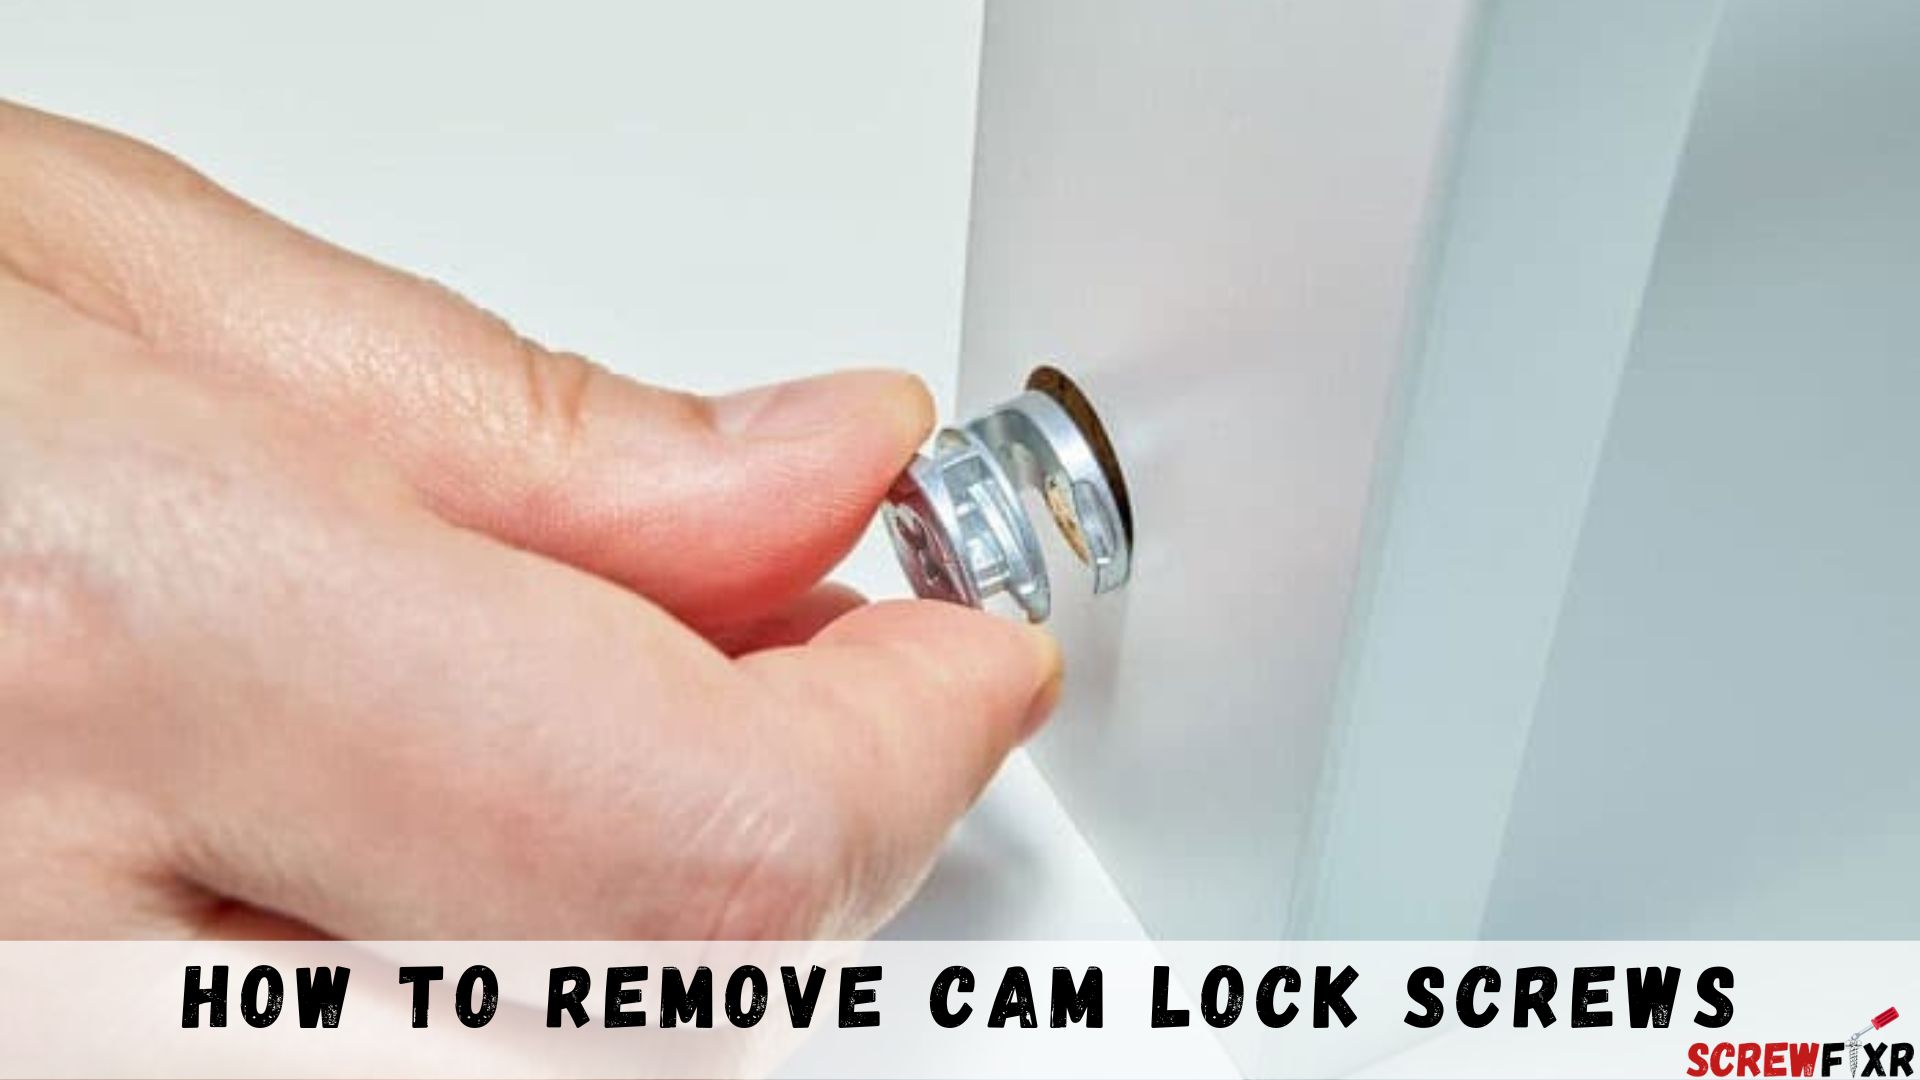
Cam lock screws can be quite a puzzle, but fear not! In this comprehensive guide, we will unravel the mystery of how to remove cam lock screws with ease. Whether you’re assembling furniture or working on DIY projects, understanding the art of cam lock screw removal is a valuable skill. We’ll walk you through each step, providing insights, tips, and tricks to make the process a breeze.
Understanding Cam Lock Screws
What Are Cam Lock Screws?
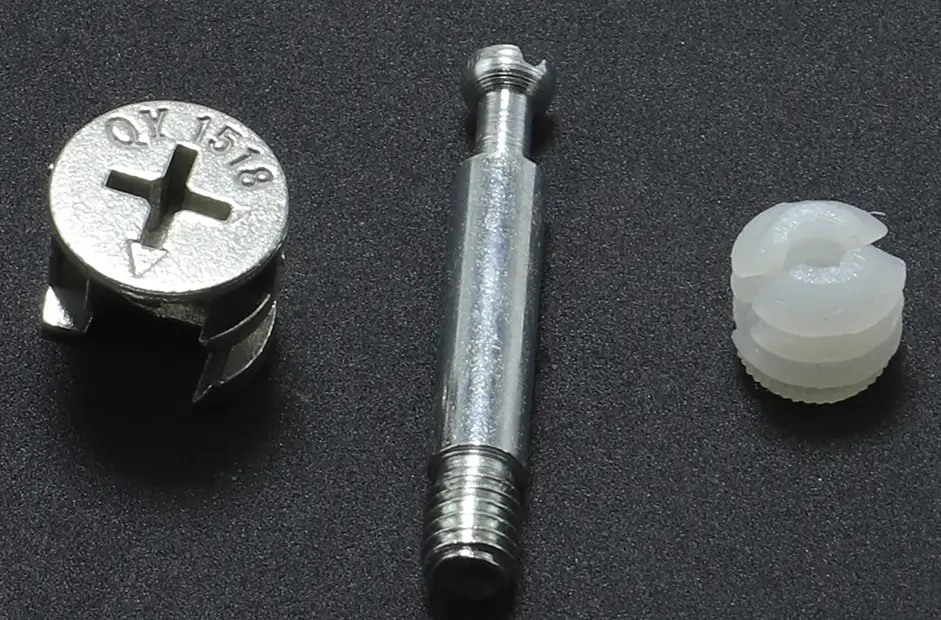
Cam lock screws, often referred to as cam locks or cam dowels, are small yet essential fasteners used in furniture and cabinet assembly. They are designed to securely join two or more components, such as panels, boards, or pieces of wood, without the need for visible screws or nails. Cam lock screws consist of two primary parts: a cylindrical metal dowel and a threaded cam, which is a flat metal or plastic piece with a rotating arm.
Common Uses in Furniture and Cabinets
Cam lock screws play a pivotal role in the construction of furniture and cabinets. Their versatility and ease of use make them a preferred choice for various applications, including:
- Flat-Pack Furniture: Cam lock screws are commonly found in ready-to-assemble furniture, such as bookshelves, wardrobes, and entertainment centers. They enable manufacturers to create compact, easily transportable items.
- Kitchen Cabinets: Many kitchen cabinet systems utilize cam lock screws to join the cabinet panels and create a sturdy framework. This allows for efficient installation and customization.
- Closet Systems: Cam lock screws are used in closet organizer systems, facilitating the assembly of shelves, drawers, and hanging rods.
- Office Furniture: Desks, office chairs, and file cabinets often incorporate cam lock screws to ensure stability and durability.
Different Types of Cam Lock Screws
Cam lock screws come in various types and sizes to accommodate different assembly needs. The most common variations include:
- Threaded Insert Cam Locks: These feature a threaded metal insert embedded in one component and a matching cam in the other. When the cam is rotated, it pulls the components together tightly.
- Wood-to-Wood Cam Locks: Designed specifically for wood-based furniture, these cam locks ensure a snug fit between wooden panels.
- Metal-to-Metal Cam Locks: Ideal for joining metal parts, these cam locks provide a reliable connection in industrial applications.
- Plastic Cam Locks: Frequently used in lightweight furniture, these cam locks are cost-effective and easy to install.
Understanding the various types of cam lock screws and their applications is essential before embarking on their removal journey. In the next sections, we will explore the tools and techniques required to remove these versatile fasteners effectively.
Tools and Materials Required
When it comes to removing cam lock screws, having the right tools and materials at your disposal is crucial for a successful and hassle-free process. This section outlines the essential items you’ll need, as well as some optional tools for added convenience and safety gear to ensure a smooth removal process.
Essential Tools for Removing Cam Lock Screws
- Screwdriver: A flathead or Phillips screwdriver, depending on the type of screw, is a fundamental tool for removing cam lock screws. Ensure it fits snugly into the screw head.
- Pliers: Needle-nose pliers or standard pliers can be handy for gripping and turning the cam lock screw, especially if it’s stuck or hard to reach.
- Rubber Mallet: Sometimes, a gentle tap with a rubber mallet can help loosen a cam lock screw or separate joined components.
- Small Hammer: A lightweight hammer can be used alongside a screwdriver to provide extra torque when turning the screw.
- Allen Wrench (Hex Key): If you’re dealing with a hexagonal cam lock screw, having the correct-sized Allen wrench (Hex Key) is essential for effective removal.
Optional Tools for Easier Removal
- Cordless Drill: While not essential, a cordless drill with a screwdriver bit can expedite the process, especially if you have multiple cam lock screws to remove.
- Screw Extractor: In cases where the screw is stripped or damaged, a screw extractor can be a lifesaver. It’s designed to grip onto stripped screws and ease them out.
- Adhesive Remover: If adhesive was used in addition to cam lock screws, an adhesive remover can help dissolve the adhesive, making removal easier.
- Clamps: Sometimes, clamps can help secure the components in place while you work on removing the cam lock screws.
Safety Gear and Precautions
- Safety Glasses: Protect your eyes from flying debris or accidental splinters during the removal process.
- Gloves: Wear gloves to safeguard your hands from sharp edges and to provide a better grip on tools.
- Dust Mask: If you’re working on older furniture, it’s a good idea to wear a dust mask to avoid inhaling any dust or debris that may be released during the process.
- Well-Ventilated Area: Perform the removal in a well-ventilated space to avoid inhaling fumes from adhesives or dust.
- Readiness for Unexpected Issues: Always be prepared for unexpected challenges, such as stripped screws or hidden obstructions.
Having these tools, materials, and safety precautions in place will set you up for a successful and safe cam lock screw removal process.
How to Remove Cam Lock Screws Step-By-Step Removal Process
Now that you have all the necessary tools and knowledge, let’s dive into the step-by-step process of removing cam lock screws. This section will guide you through each phase of the removal process, ensuring a smooth and successful operation.
Removing the Outer Cover or Panel
- Locating and Identifying the Cover:
- Begin by identifying the outer cover or panel of the furniture or cabinet that conceals the cam lock screw. Look for seams, edges, or access points.
- Removing Fasteners Holding the Cover:
- Carefully inspect the cover for any visible fasteners, such as screws, nails, or staples, holding it in place. Use the appropriate tool (screwdriver, pliers, or drill) to remove these fasteners without damaging the cover.
Exposing the Cam Lock Screw
- Identifying the Cam Lock Screw:
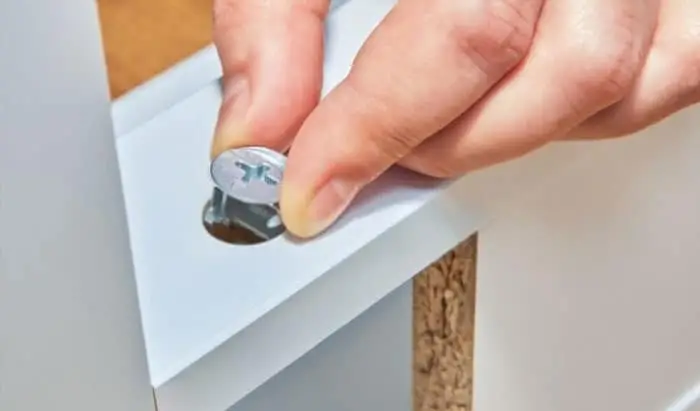
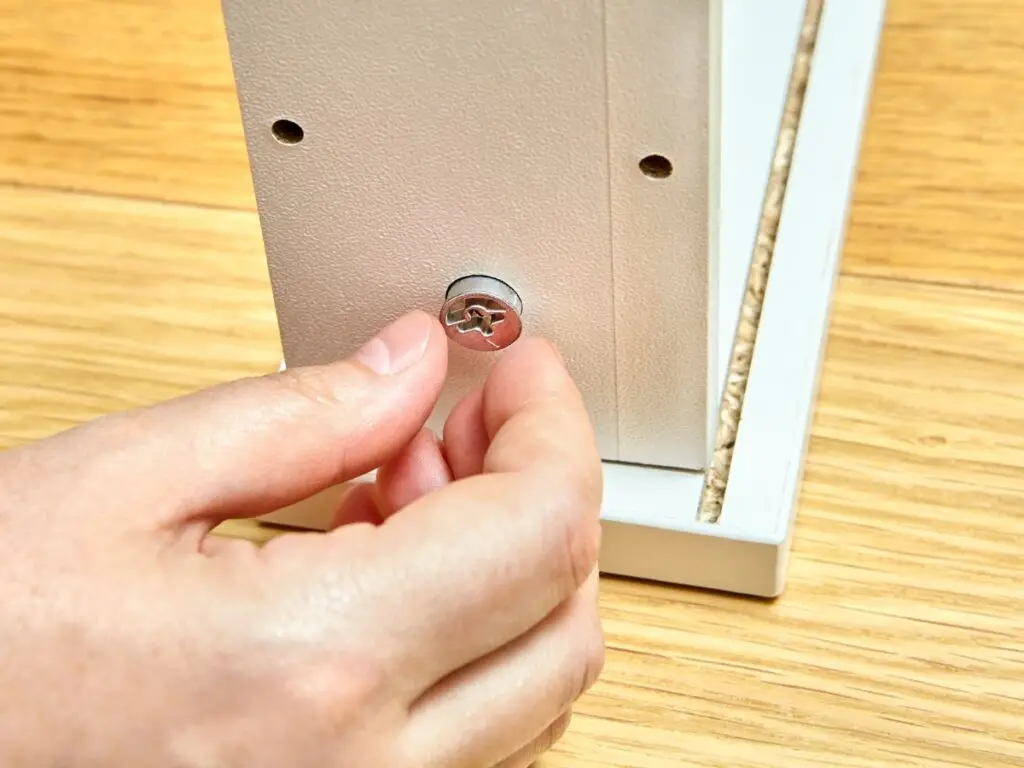
- With the outer cover removed, locate the cam lock screw. It typically appears as a small, cylindrical metal dowel with a threaded cam attached. Take note of its position.
- Understanding Its Mechanism:
- Familiarize yourself with the cam lock screw’s mechanism. The threaded cam can be turned clockwise to secure components together and counterclockwise to release them. Understand how the cam lock screw interacts with the parts you’re separating.
Using Basic Tools for Removal
- Screwdriver Method:
- Insert a suitable screwdriver into the cam lock screw’s head.
- Apply gentle pressure and turn the screwdriver counterclockwise. Use steady force to prevent stripping the screw.
- Continue turning until the screw is completely removed.
- Pliers Method:
- If the screwdriver method proves challenging, grip the cam lock screw head with pliers.
- Apply even, firm pressure and turn the pliers counterclockwise to unscrew the cam lock.
Alternative Methods for Stubborn Screws
- Rubber Band Trick:
- Place a rubber band over the cam lock screw’s head to provide extra grip.
- Insert a screwdriver into the screw head over the rubber band and turn counterclockwise. The rubber band enhances traction.
- Using Adhesive:
- Apply a small amount of adhesive remover or lubricant to the cam lock screw.
- Wait for it to penetrate and loosen any debris or rust.
- Use a screwdriver or pliers to attempt removal once the screw is less resistant.
Common Mistakes to Avoid
While removing cam lock screws, be mindful of common mistakes that can lead to complications:
- Avoid excessive force that may strip the screw head.
- Double-check the screw’s direction (counterclockwise) for removal.
- Don’t neglect safety precautions, such as wearing safety glasses and gloves.
- Refrain from using tools that don’t fit the screw head properly, as they can damage it.
By following these step-by-step instructions and being cautious of common pitfalls, you’ll successfully remove cam lock screws with precision and care.
Troubleshooting and Challenges
Even with the right tools and techniques, removing cam lock screws can sometimes present unexpected challenges. This section explores common issues you may encounter and provides strategies for overcoming them.
Dealing with Stripped or Damaged Screws
- Using a Screw Extractor: When a cam lock screw’s head is stripped, a screw extractor can be invaluable. It works by gripping onto the screw’s body and allowing you to turn it counterclockwise for removal.
- Pliers or Gripping Tools: If a screw extractor isn’t available, use pliers or locking pliers to get a firm grip on the screw head and slowly rotate it counterclockwise. Apply steady pressure to avoid further damage.
- Drilling a New Hole: As a last resort, you can carefully drill a small hole into the screw’s center and then use a screwdriver or an extractor on the newly created hole for removal.
Removing Cam Lock Screws in Tight Spaces
- Use of Extension Tools: If the cam lock screw is in a confined or hard-to-reach area, consider using an extension tool or a flexible screwdriver attachment to access it.
- Partial Disassembly: In some cases, it might be necessary to partially disassemble the furniture or cabinet to gain better access to the tight spot.
Strategies for Stuck or Rusted Screws
- Penetrating Oil: Applying a penetrating oil or lubricant to the stuck or rusted cam lock screw can help loosen it over time. Allow the oil to penetrate for several hours or overnight before attempting removal.
- Heat Application: Carefully heating the area around the screw with a heat gun or a hair dryer can expand the metal slightly, making it easier to turn the screw.
- Vibration Method: Gently tapping the area around the screw with a small hammer or mallet while applying slight turning pressure can help break the rust or debris holding the screw in place.
- Impact Driver: An impact driver delivers strong rotational force and can be effective for removing stubborn or rusted cam lock screws.
By understanding these troubleshooting techniques and being prepared for unexpected challenges, you’ll be better equipped to tackle even the most stubborn cam lock screws.
Frequently Asked Questions
Can I reuse cam lock screws?
Absolutely! Cam lock screws can be reused, provided they are in good condition. Check for any signs of wear or damage before reinserting them.
What if the cam lock screw is stripped?
If the cam lock screw is stripped, you may need to replace it. Contact the manufacturer for replacement screws or consider using alternative fasteners.
Are cam lock screws durable?
Cam lock screws are known for their durability. When properly installed and maintained, they provide reliable support for your furniture.
Can I use power tools to remove the cam lock screws?
While it’s possible to use power tools, it’s recommended to use manual tools like a screwdriver to prevent over-tightening or damaging the furniture.
How can I prevent cam lock screws from loosening?
To prevent cam lock screws from loosening over time, consider using a small amount of wood glue when assembling furniture.
Are cam lock screws universal?
Cam lock screws come in various sizes, so they are not always universal. Make sure to match the size and type of cam lock screw when replacing or reusing them.
Conclusion
Removing cam lock screws may seem daunting at first, but with the right tools and techniques, it becomes a straightforward task. We hope this guide has empowered you with the knowledge and confidence to tackle cam lock screws in any project. Remember to proceed patiently and carefully, and you’ll have those cam lock screws removed in no time!
